CityEngine to GearVR
In this guide I will take you through the process of getting your CityEngine project onto the GearVR headset.
Requirements
- Samsung GearVR and a compatible phone
- CityEngine 2016.1 or later
- ArcGIS 360 VR (I will cover installing this)
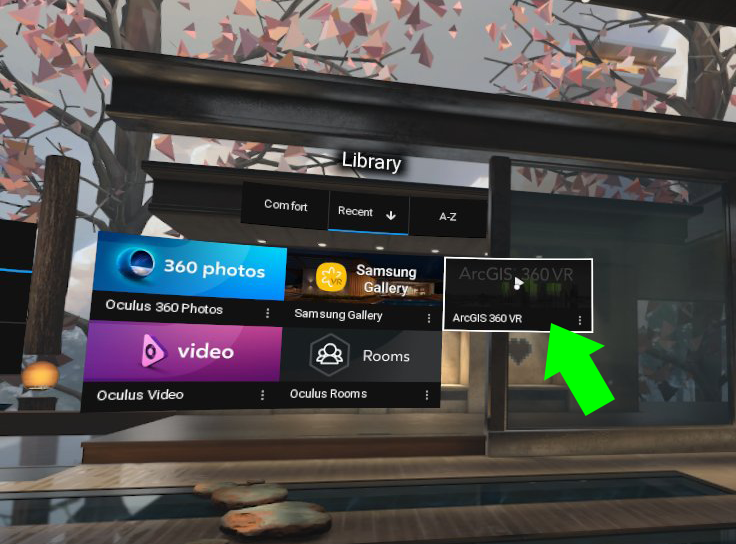
Step 1. Getting Access to ArcGIS 360 VR
To be able to view your CityEngine project on the GearVR, you’re going to need the proper application for it. So to start out, go to Esri Labs’ website, here, make an account, and request access. They should send you some keys for ArcGIS 360 VR shortly. We’re doing this first because it might take a little while before your keys are sent out, so might as well make it so that you can spend the time waiting doing other things.
Step 2. Uploading your VR Experience from CityEngine
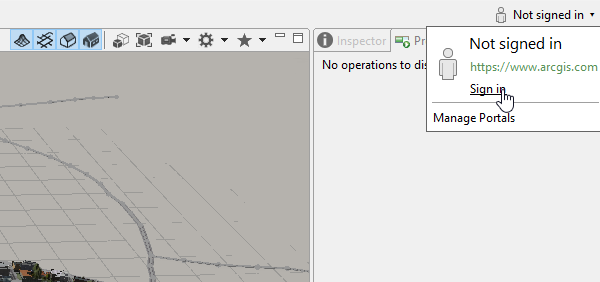
To start out with, make sure you are logged into your ArcGIS Online account within CityEngine. You can do that in the top right corner.
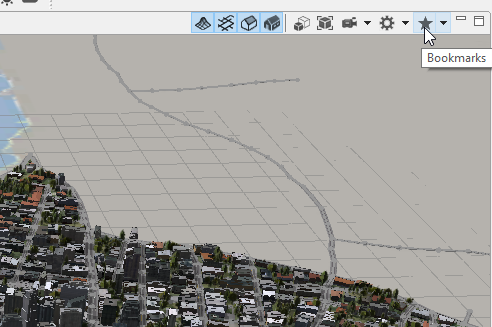
For the next part of the tutorial, you will need an existing CityEngine project set up with one or more camera bookmarks. To place bookmarks, move your camera around the environment and click the bookmark button in the top right of the viewport.
The bookmarks will be used in the virtual environment, so if you are aiming for realism, make sure these are around eye level. You can place as many as you want.
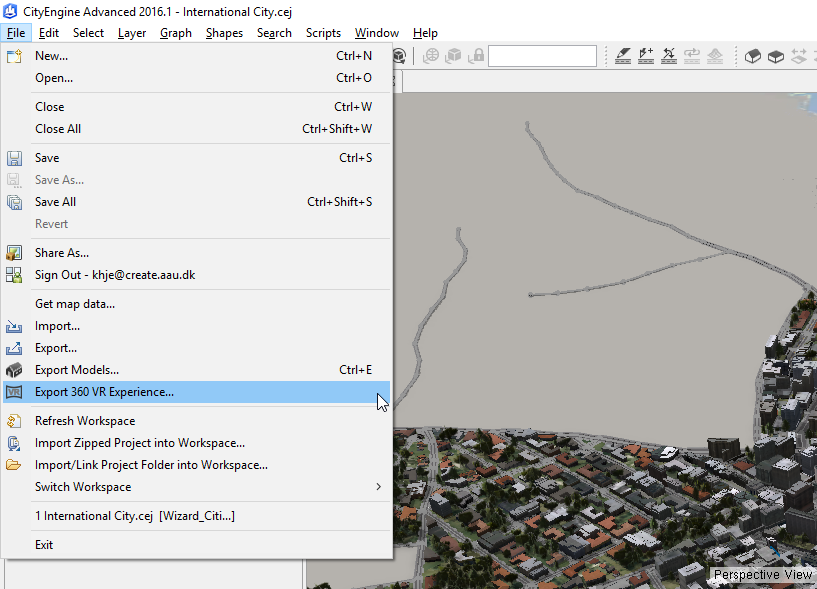
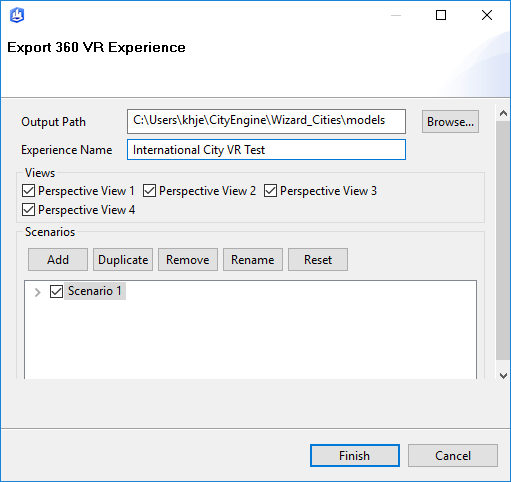
When you are ready, go into the ‘File’ menu, and select ‘Export 360 VR Experience’.
In prompt that pops up, you can leave the output location as is. The name you give it here does not really matter, but make sure that you pick all the views and scenarios that you want to export.
When you’ve exported your VR experience, go to your models folder in the navigator and find the .3vr file you just exported. Right click it and select ‘Share As’.
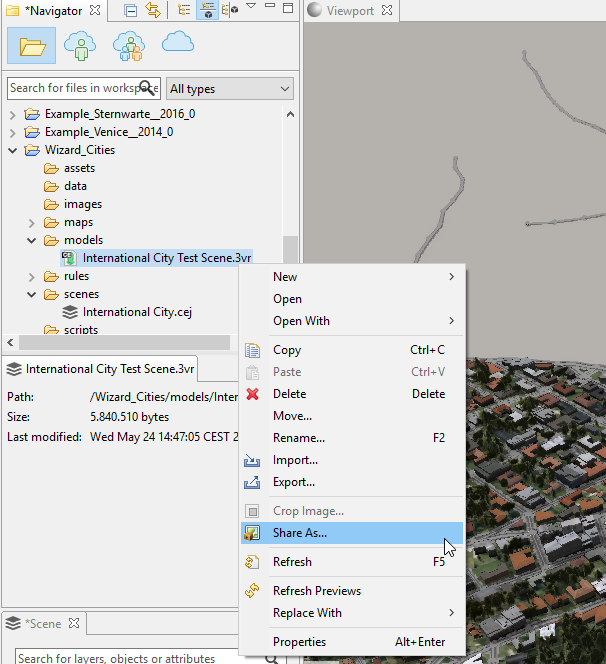
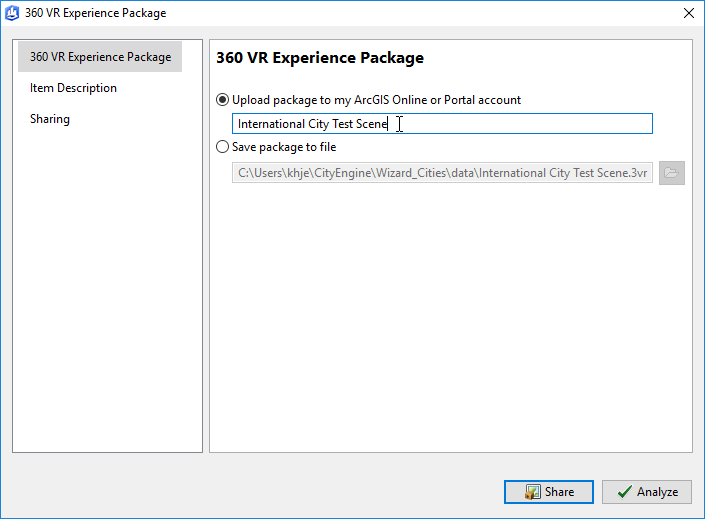
The only important thing here is to give your project a name so you can find it again. The rest of the settings can be left as default.
That’s it! Now you just need the GearVR application, and you’re good to go.
Step 3. Installing ArcGIS 360 VR
After you receive an email with codes for the application, open the Oculus app on the phone you are planning on using. There, click the ‘more’ button in the bottom right corner.

From there, go to the ‘Redeem code’ option.
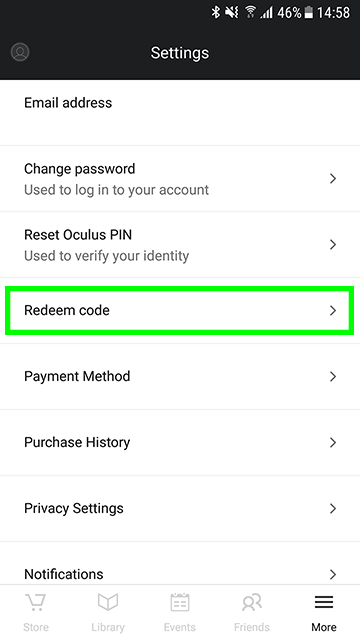
Put in one of the codes from the email you received.

Step 4. Setting up ArcGIS
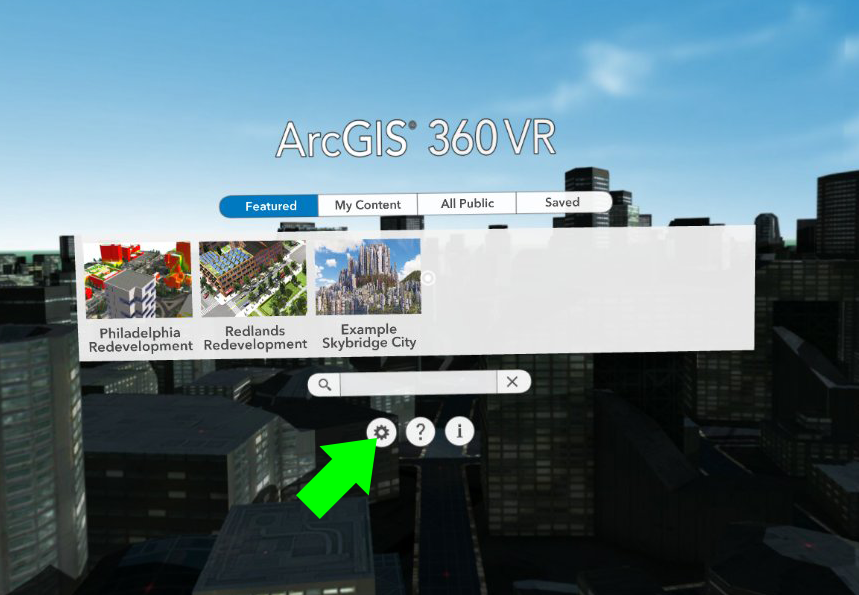
Now that you’ve uploaded your project from CityEngine, and installed ArcGIS 360 VR, it’s time to have a look at it. Put the GearVR on, and in the Oculus Home menu, navigate to the ArcGIS 360 VR application.
When ArcGIS 360 loads up, you are presented with the following screen. The first thing you want to do from there is head into the settings menu.
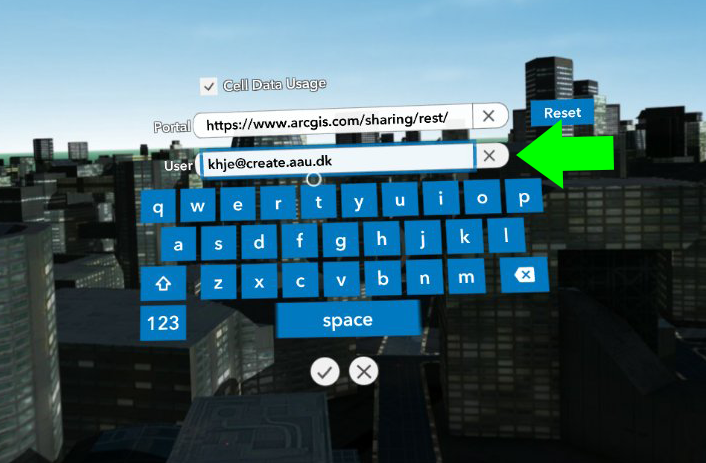
In the settings, set your User to the same as you are using for your Esri account. This will be the same as you used for applying for access to ArcGIS 360 VR, as well as the one you used for uploading your project from CityEngine.
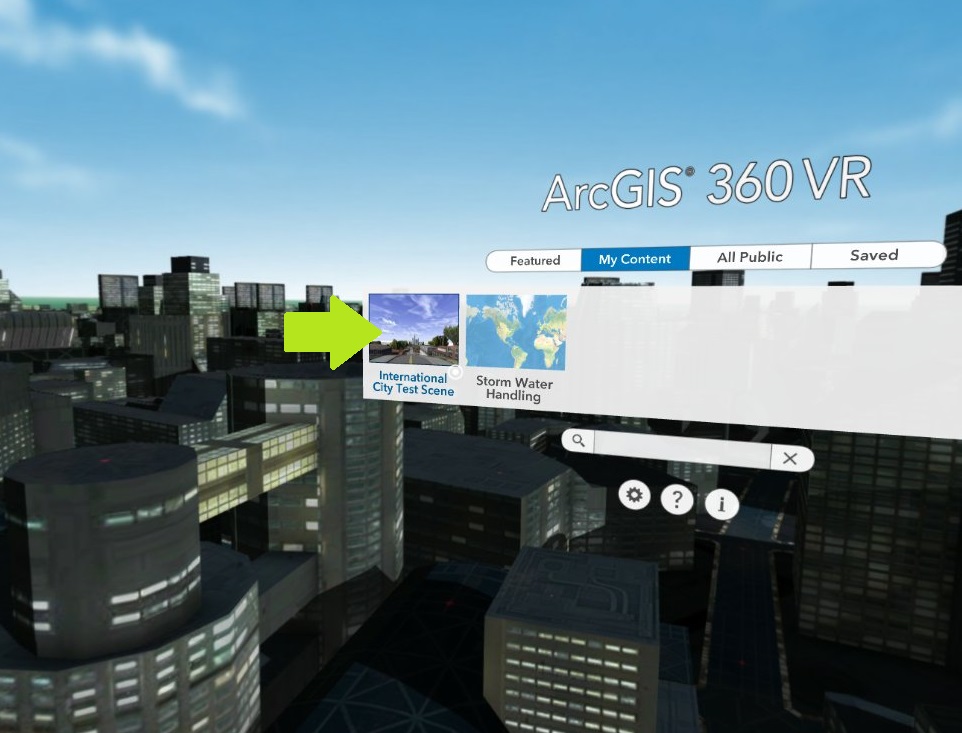
When you’ve set your username, head back to the main menu, and switch over to the ‘My Content’ tab. If you’ve done everything correctly, you should see your project now.
When you open the project, you are presented with a list of the views you exported earlier. You can move through them by clicking the touchpad on the GearVR while looking at them.
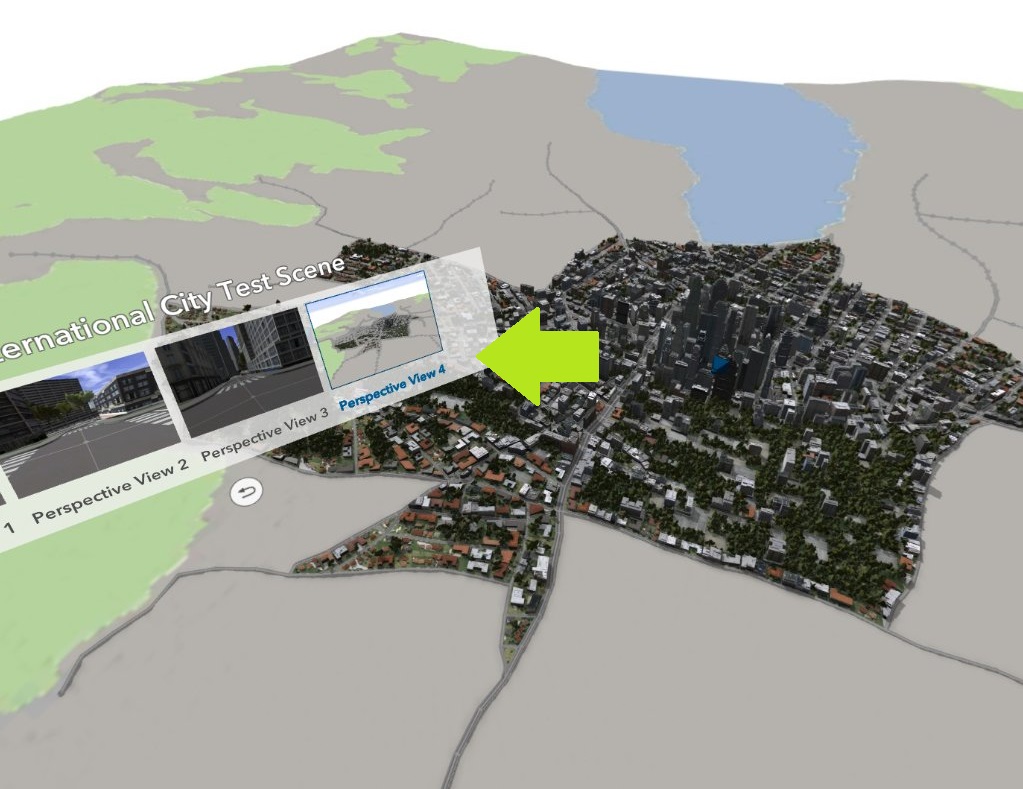
Or by clicking them as you look around:

Clicking outside of the menu will make it go away so you get an unobstructed view. Click again to bring it back.

Enjoy getting a new perspective on your project!
 Previous Post
 Next Post